Simple Ways to Decorate Your Walls on the Cheap
 The most common mistake most people make when decorating their walls is to sprinkle things around just to fill empty space.
Solution: Draw an imaginary rectangle on the main focal wall in the room you wish to dress up. Fill that rectangle with a grouping of related art, such as portraits, plates, or clocks. This makes a stronger impact for the room than the "sprinkle" effect.
Try to hang larger scale items to make your rooms seem bigger. This doesn’t mean you have to run out and spend hundreds or thousands on a large painting! Hang a rug or a pretty quilt.
Create a dramatic wall hanging with a large piece of plywood, some paint, and one inspirational word in large letters. "Faith", "Believe" or "Dream" are great ones.Then sketch on your word in blocks with pencil, and fill in with paint.
*Try setting off a special portrait or a wall collection by painting a background "frame". Make the frame at least 4-6 inches larger than the art, tape off with painters tape, and fill in with a darker version of your wall color. Paint a simple border and background in neutral colors.
If you have dozens of different sized frames and pictures, tie them together by painting the frames all the same color. Black gives an elegant touch to any style décor. White is very fresh, and a bright color can be found in a contemporary design.
*Consider using stencils to add detail and design to your walls. It’s easy, relatively fast, and inexpensive. Pick up a simple design to wrap around windows and doors, or to add detail to your painted "frames" around your wall art groupings.
Finally, look at unconventional items to use as wall art. A weathered piece of driftwood accents over a doorway, or an old wooded box can hang as a curio cabinet. Simple wooded blocks can be attached to the wall as candleholders or display shelves. Your children’s christening dress can be hung as memory art, or you can frame a piece of the maternity dress you loved while you were pregnant with your youngest. Use your imagination!
Sponging Tips and Tricks
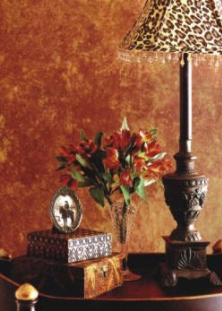
 Sponging is one of the easiest and most inexpensive ways to give a room an attractive makeover. The technique creates an illusion of texture which is great for hiding imperfections or irregularities in your walls. The following tips will help ensure that your sponging endeavours will result in fun and fabulous rooms.
Generally you want to use an organic sponge as the irregular shape will create better patterns on your walls. Before you start, the wall should be painted in a subdued white or off white background color using a standard brush. This is the canvas for your sponge art.
Pour the paint color you will be sponging into a roller tray. When dipping the sponge in the paint, dab it on a piece of newspaper to remove any excess. Too much paint and you can end up with drips.
Pat the sponge against the wall lightly, creating random patterns as you move across the surface. Your first coat should be light, and you should step back often to view the entirety of your work. Remember it’s always easier to put more paint on than to take it off.
If you like, a second complimentary color can be sponged on top of the first one to create a contrasted effect. However it’s important to make sure that this second color is not too different from the first or you’ll end up with a chaotic look.
If you find that you are unable to complete the job in a single day, store the sponges in air tight zip lock bags so that they don’t dry out. When you finish, make sure that you write down the exact paint numbers used so that you can go back and touch up the wall if anything happens to it.


